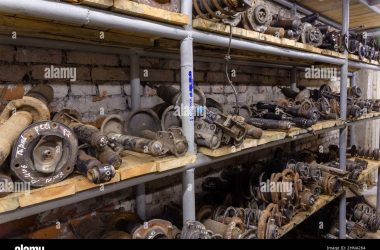

Let’s be honest. The cost and hassle of sourcing car parts can be a real headache. That little plastic clip that holds your trim in place? Discontinued. A custom gauge pod for your project car? Might as well be made of unobtanium. Well, here’s the deal: your garage workshop is about to get a major upgrade.
3D printing isn’t just for figurines and phone cases anymore. It’s quietly revolutionizing the way car enthusiasts, DIY mechanics, and even restorers think about parts. This guide isn’t about printing an entire engine block—let’s be realistic—but it is your roadmap to creating functional, durable, and downright clever automotive solutions right at your bench.
Why Bother? The Real-World Perks of Printed Parts
First off, why go through the trouble? Sure, it sounds cool, but the practical benefits are what truly sell it. Think of your 3D printer as a tiny, on-demand factory.
You save a ton on those infuriatingly overpriced OEM plastic bits. You can resurrect parts for classic cars that simply don’t exist in the supply chain anymore. And for customizing? The freedom is intoxicating. Design a phone mount that perfectly fits your dash’s weird curve, or create a bespoke bracket for auxiliary lights. The limit is pretty much your imagination—and, okay, a few technical constraints we’ll cover.
The Nuts and Bolts: What You Actually Need
Alright, let’s dive in. You don’t need a lab-grade setup to start, but you do need the right foundation. Here’s the basic toolkit.
The Hardware: Printer & Materials
A decent FDM (Fused Deposition Modeling) printer is the workhorse here. Brands like Creality, Prusa, or Bambu Lab offer models that are reliable and won’t break the bank. For materials, you’ve got choices:
- PLA: Easy to print, but brittle and hates heat. Great for prototypes, bad for under-hood parts.
- PETG: The sweet spot for many. It’s tough, has decent heat resistance, and is chemical-resistant. Think interior trim, covers, or brackets.
- ASA or ABS: The heavy-duty options. Fantastic UV and heat stability. Perfect for exterior parts, engine bay components, or anything that needs to weather the elements. They’re trickier to print, though, often needing an enclosed printer.
- Nylon or Composites: For advanced users. Incredibly strong and heat-resistant, but hygroscopic and a pain to print.
The rule of thumb? Match the material to the part’s stress and environment. A cup holder insert can be PLA. A radiator fan shroud? Go with ASA.
The Software: From Scan to Solid
This is where the magic happens. You’ll need a way to get a 3D model. Sometimes you can find ready-made files on sites like Thingiverse or Cults3D. But for true custom or replacement work, you’ll need to create your own.
For reverse engineering a broken part, a caliper is your best friend. Measure meticulously. For software, start with free tools like Tinkercad for simple shapes. Fusion 360 or FreeCAD offer powerful, professional-grade parametric modeling for more complex designs—there’s a learning curve, but it’s worth it.
And for really complex, organic shapes? Photogrammetry apps on your phone or a budget 3D scanner can create a basic “cloud” to work from. It’s not perfect, but it gives you a stunning head start.
The Workflow: From Broken Part to Finished Piece
Let’s walk through a real example. Say the glovebox latch in your ’90s truck snapped. Here’s how you’d tackle it.
- Diagnose & Document: Clean the broken part. Figure out how it failed. Take lots of photos from every angle next to a ruler for scale.
- Measure & Model: Using your calipers, measure every dimension. Start modeling in your CAD software. This is the most time-consuming part—be patient. A good model means a successful print.
- Slice & Prepare: Import your model into a slicer (like PrusaSlicer or Cura). Here, you’ll orient the part for strength, add supports if needed, and set infill density. For a load-bearing latch, you might use 40-60% infill.
- Print & Post-Process: Start the print and let it run. Once done, remove supports, sand any rough edges, and test fit. You’ll almost always need a version 2.0—that’s normal!
- Test & Iterate: Fit the part. Does it work? Does it flex too much? Tweak the model and re-print. This iterative process is core to the whole endeavor.
Smart Design Tips for Strength and Fit
Printing a solid block of plastic isn’t always the answer. Design for the process. Use fillets (rounded corners) to reduce stress points. Consider print orientation—layer lines are a weak point, so orient the part so force is applied across them, not trying to peel them apart.
For press-fit parts, you’ll need to account for tolerance. A 0.2mm to 0.4mm gap between mating parts usually works for a snug, non-binding fit. Just… test on a small scale first.
And don’t forget heat-set inserts. These little brass threads are pressed into a printed hole with a soldering iron. They give you robust, metal threads for screws that won’t strip out. A total game-changer for any part that needs assembly.
What Should You (And Shouldn’t You) Print?
This is the critical safety chat. Your responsibility is huge. You must know the limits.
Great Candidates: Interior trim clips, knob covers, custom switch panels, antenna gaskets, tool organizers, battery terminal covers, emblem overlays, headlight washer caps, prototype intake parts for testing.
Proceed with Extreme Caution: Any exterior part subject to direct sun and weather (must be in ASA/ABS). Non-critical under-hood brackets (away from direct exhaust heat).
Just Don’t. Seriously: Any brake component, steering parts, suspension components, seatbelt hardware, or anything critical to occupant safety. The consequences of layer adhesion failure under stress are unthinkable. This is where printed parts cross the line from brilliant to dangerous.
The Future is in Your Garage
So, where does this leave us? Honestly, we’re at the beginning of a quiet revolution. The ability to digitize a broken piece of history and bring it back to physical life is… profound. The empowerment of designing a solution to a nagging problem instead of scouring the internet for weeks is addictive.
It won’t replace traditional machining or professional parts sourcing. But it adds a powerful, flexible tool to your kit. It turns “they don’t make that anymore” from a funeral dirge into a creative challenge. You’ll look at your car—and every broken thing around you—differently. Not as an end user, but as a potential maker.
Start small. Print a simple hook for your garage wall. Then maybe a custom coin tray. Learn the feel of the materials, the quirks of your machine. Before you know it, you’ll be holding a perfect, warm-off-the-bed replacement for that stupid, overpriced clip—and you’ll have fixed more than just your car.